


How to knit the cutest baby sandals. Choosing what to do for a newborn can be very difficult, and while you may just be buying a gift certificate or sending a monkey, homemade gifts are much cuter. First, however, how do you know what to do? If you’ve always understood crochet baby sandals, you will see that they are all of the cutest people in the world, and luckily, they are also straightforward to make, even for those who are not well-versed in crochet.
You can choose yarns that perfectly suit your parents’ tastes or even combine them with your favorite outfit. Add flowers and lotus flower drawing, gemstones, butterflies, hearts, or just fancy patterns – you can do whatever you want with these! Make sure there are no parts that can be pulled out or swallowed.
Table of Contents
Crochet baby flip flops
Materials
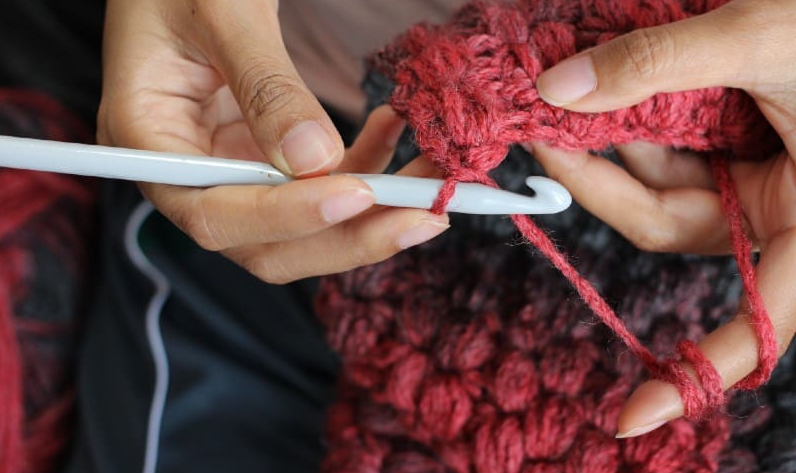
For your baby sandals, you will need:
- One 3mm crochet hook
- 1-2 balls of fine yarn in the color of your choice
- Pair of scissors
- A wool needle (to knit the ends)
- Stitching threads (matching / corresponding colors to your cloth)
- Colored markers (not necessary but can be helpful for counting)
Step 1: start the sole
Take the end of both skeins of yarn and align the ends. You will crochet using both skeins at the same time. Make a slip knot and chain thirteen. Check your count. Count two stitches back and double crochet in the third chain stitch. Make second double crochet at the same point. Double crochet (just one) in the next nine chain stitches so that you go back to the beginning of your chain. In the final stitch, you will make five double stitches. You will see that the thread begins to curl to form one end of the sandal.
Step 2: Continue with the sole
Now, following the other side of the chain, you will double crochet in each of the nine stitches, just like you did before. Again, count as you go to make sure you get the numbers correct. So, do two double stitches in the last stitch. It will bring your total to five at each end. Next, slip the hook into the third stitch and slip a slip stitch to join the loop.
Step 3: the second round of the sole
Make a chain stitch and then double crochet in the first stitch. Next, make two low crochet hooks in the next stitch. Then double crochet the next four stitches, then double crochet the next five stitches. In the following five points, put two double effectiveness in each. You should see that this works around the end of the oval, increasing the size of the sandal sole.
Double crochet the next five stitches. In the following four points, put a low point. You should see how this pattern is the opposite of what you just did on the other side; You are making a wider end of the sandal for the baby’s toes and a narrower end for the heel. Make two more points on the following two points. It will have brought you back to the heel of the sandal, and you can join the round with a slip stitch in the first chain stitch.
Step 4: third turn of the sole
We still need a bigger scandal, so it’s time for another round. Chain and then double crochet in the first four stitches. In the next nine stitches, place a single hook in each. It is returning to the toes, where it must step up again. In the following 10 stitches, put two separate crochets. Count to make sure you got it right, then single crochet the following nine points. It would help if you were close to the heel of the sandal again. For the following four points, make two individual points on each one. It should now be on the heel again. You can pass the stitch in the first stitch and then cut and tie the thread. Make sure the knot is tight so that the sole cannot unroll. You can knit last with the threaded needle now or later.
Step 5: make three more soles
You will need to make three more soles for the baby’s sandals. After that, it will match up and have two feet on each shoe; this is wherever the stitching thread appears.
Step 6: sew the soles together
Match two of your soles and grab your yarn. A complementary color is a good option, but you can use the same color. You can also use a dazzling thread if you want the sandals to shine; combine it with the rope and follow the instructions for the adventure. Line up the soles and find the first point on both. Use your hook to loop a loop of the yarn through the first stitch. Pinch the end of the thread under your finger on the other side, so it doesn’t get through.
With the loop still on the hook, push the pin through the second stitch on both soles and pass another loop of yarn. You should now have two loops on your hook shallow point. Please do this at the third stitch, slip stitching it to the current ring, then repeat around the sole. Check that your sandals are aligned. When the round is done, cut the thread and thread the line into the needle, using this to finish the edge and make sure the two soles are securely attached. Finish off at the ends. Repeat this with the other pair of soles.
Step 7: make the back of the top shoe
There are many different attachment options, but flip flops are cute and easy. First, point the sandal away from you so that the heel is closer to your body—count eight stitches from the back of your sandal to the right. Pass the hook through this point and then through the seventh point so that the sandal is wrapped around the bend. Next, thread a loop of yarn and make a chain. Pass the string over the hook and push it back through the eighth stitch, coming out through the seventh. Hook another loop of yarn to get the third loop on the theme and then double crochet.
Make a loop of the yarn, knit the seventh and sixth stitches, pass another loop, and double crochet between the seventh and sixth stitches. Do the identical within the sixth and fifth, fifth and fourth, etc. It would help if you arrived at eight when you got to the back of the sandal. Now work eight stitches in the other direction, doing the same, so that you have eight treble crochets on both sides of the heel, 16 in total. Check that the sides are aligned. It should now be on the left side of the sandal.
Step 8: continue the back of the top shoe
Transform your job but don’t chain one. Instead, skip the first stitch and double-crochet the second. Go on, so you have to fill in 15 treble crochets (since you missed one of the original 16). When you get to the end, turn around, skip the first stitch, and double-crochet the remaining 14. Turn around, skip one stitch, and single crochet all the remaining stitches when you get to the back again.
Step 9: make the strap
We will start with the left shoe. 13 point chain. Locate four points in the sole center and push the hook into the fifth point from the right side. Slide it so that the theme comes out of the fourth center point. Hook the thread and make a slip stitch. Chain 15, and then you can hook to the other side of the back of the sandal, with a slip stitch in the stitching.
Also Read: Art Resources


